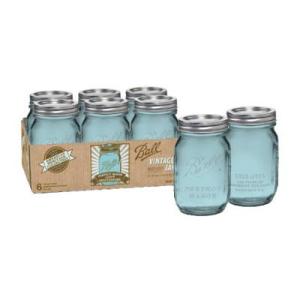
Ball Heritage Collection, Vintage Blue Canning Jars

Heritage Ball Jars

Now, I’m know that I’m not the only one coveting these Heritage collection vintage blue Ball jars.  Wee Folk Art just posted on Facebook with a link to a tutorial that shows how to tint your own glass jars.  Which then reminded me about these jars and how I had wanted to go on the search for some.  They are $13.xx something on Amazon (Prime), which is of course pricey for 6 pint jars.  So, I checked my local True Value hardware store, and they had them for $10.99 with free ship to store (they weren’t in-stock at my local store).  I couldn’t resist!  Now, what to do with them when they arrive??  I wonder how canned goods would look with the blue tint?  I will probably save them for craft projects.  They would be great little center pieces or flower jars on the patio this summer.  Maybe some end-of-the-year teacher gift giving.  Thousands of ideas of things to do with  Ball jars — actually it’s a bit overwhelming.  I might just have to use them for drinking glasses so I can enjoy them all of the time!

Handmade Christmas Gift #1: Peg People Chinese Checkers

My boys really enjoy Chinese Checkers, so the hubby and I had an idea to make a board, and instead of using traditional pegs or marbles, I would paint little peg people in different colors.  The rules for Chinese Checkers are pretty simple, and it’s easy for even a 4-5 year old to begin playing with minimal assistance.  We made our first one, and brought it out to Michigan as a gift for my brother-in-law’s family.  I hope they love it!  I have a feeling that the little people may end up being used for many more things than just a Chinese Checkers game.

Hubby made the board with plywood, and used a drill press for the holes.  He made a very nice, elaborate template to line up all the holes accurately.  I think he is going to do a full story on the board/box on his blog(UPDATE:  Here’s his post on the nitty-gritty box making!)

Used the template to pre-mark holes with a small nail, then used that hole to line up the drill press

I was in charge of painting little peg people and I did the painting on the board triangles.  We decided on the following color scheme:

Black – Ninjas
White – Snowmen
Red – Pirates
Blue – Princesses
Green – Elves/Archer-types
Brown – Indians

I did about two coats of paint, and two coats of mod podge to seal them.  They are the “little boy” people that you can get at Caseys and they have a 5/8″ bottom diameter.  I used little pots or clothespin doll stands to help stand them upside-down when the bottoms needed to dry. It worked well.  I put the year and family initial on the bottom.

Painting tip for the eyes — don’t use a paint pen.  The eyes bled a bit when I used a paint pen.  When I just used a small tip paintbrush, they turned out much better.

The board is on top of a box that the hubby made, and I sewed up a little felt bag to hold the people inside the box for storage.

This was so fun to make!  Now we need to make one for our boys.  I have asked hubby to use a bit thicker of a piece of plywood, so the holes can be deeper.  It was too easy to knock over the pieces when playing with the depth that he drilled the holes on this version.  Hubby sealed the entire game/box with shellac.

Here are some close-ups of the little people:

Ready for a game!

Secret Christmas Crafting

I have some special plans for these little guys.  I can’t wait to share, but for now, it’s hush hush.  Aren’t the snowmen cute, though??  These are the tiny “boy” peg dolls that are 1-11/16″ tall.  Hubby and I are collaborating on something.  Fun, fun!

The Start of Christmas Crafting

Now, what do we have here!?

I received an order from Casey’s Wood Products yesterday.  Amazing how many little wooden things they can fit into a small priority mail box.  Lots of little wooden peg people.  Most of these little ones are the “little boy” size.  I also got some of the big people size, some blocks, and some mini and small clothespins.  I have Christmas present crafting plans!!

The boys got right to work however with my stash this morning before school crafting together a ninja army.

And a ninja flying army.

I don’t have any plans for the big people.  They are just good to have around and I was placing an order anyway.  Likewise on the clothespins, but I’d like to try painting them for some art wire displays.  Now the little boy people were my main motivation for the order.  That I have to keep a secret for the time being, but no worries, I’ll be sharing if it all works out!

Do you need any creative inspiration for your Christmas crafting projects?  Sometimes I think that I have too much inspiration!  Seriously though, I highly recommend Pinterest if you are a visual person (or even if you think you aren’t!).  I was just scrolling through it to find something that I had pinned on my Crafty Ideas board, and I was once again blown away by all the ideas swirling about my head when I saw all those lovely pictures!

And just for fun….the puppy wants to say Hi.  Is he still a puppy when he’s three?  He still acts like one.  Unlike our “old-man dog” who tore his ACL six weeks ago, poor guy.  Trying to keep up with the puppy!

Camping Shirts 2011 (Acadia National Park)

Lobster Shirts 2011

Our annual camping trip this summer was to an amazing place – Acadia National Park.  We are lucky to live so close to a national treasure.  Now, that may sound pretty hokey, LOL, but it really is a beautiful place….even in August when it’s overrun by tourists from all over the world.  To be honest, it didn’t even really feel overrun to me.  I think that might be part of the beauty of it.

In honor of heading to Mt. Desert Island for our camping trip, the boys requested lobster shirts this year.  I picked out bright green shirts, and red paint (of course!) for the lobster.  They turned out excellent!  I was going to go the easy route and find a template online that I would just trace, but it wasn’t as easy as that sounds like it should be.  I did find a nice looking stencil, but it looked funny to me.  What was wrong with it?  Oh yes, the poor lobster only had 3 sets of legs!  I’ve eaten enough of the miniscule meat out of those little legs that I knew that there should be four!  I just ended up freehand drawing my own lobster actually and they turned out great.  I only used two coats of red fabric paint.  I give instructions on how to make a freezer paper stencil in my prior posts from 2008 (bears), 2009 (moose) and 2010 (bald eagle).

In the picture above, the boys are also posing with their Harry Potter magic wands that the Hubby and I made for them.  A post on that later!  They are well-loved.

Early morning at the campsite

We camped at Mount Desert Campground and had a great time.  It’s in a wonderful, central location, and as tent campers, we appreciated the wooden platforms and the fact that they only allow trailers less than 20 feet.  Being located right on Somes Sound didn’t hurt either!  The boys really enjoyed fishing for crabs with hot dogs off their kayak docks.  We had an amazing time hiking up South Bubble (and an even more amazing time hiking down the cliff side!).  J, who just turned 7 in June, was a mountain goat and had more endurance than the rest of us.   The hike up to South Bubble (and Bubble Rock) was not that difficult and appropriate for most ages.  Instead of going back the way we came though, we decided to go down the opposite side facing Jordan Pond.  That was a steep climb down that involved quite a bit of two-handed rock scrambling (I think it’s called the Bubbles Trail).  The boys did a great job!  We then headed north around Jordan Pond, and went back up the Bubble Divide.  Then went straight up rock stairs to the ridge and then back down again before meeting back up with the original South Bubble trail.  Whew!  That one was a doozy!  Total was about 3.5 miles and the kids did great.  (Okay, I’ll admit it…it stretched my limits.)

Can they move bubble rock?! Glaciers are super-cool.

Top of South Bubble looking out over Jordan Pond. J is wearing his bald eagle camping shirt from 2010.

Down the Bubbles Trail

Back up the Bubble Divide. Only picture I took because I was huffing and puffing too much after this.

We also spent an afternoon biking on the carriage trails and did a 5.5 mile loop on the Witch Hole Pond trail.  There is a beautiful stone bridge halfway along where we stopped for some creek playing and a snack.  J just learned to ride his bike without training wheels a few months ago, and he did a great job keeping up.  He still needs to practice his gear shifting though.  Some of the hills were hard for him.

One of Acadia's famous stone bridges

On the touristy end of things, we did the Diver Ed excursion one morning.  It was awesome!  Diver Ed takes you out in his boat where he dives off the side and collects sea creatures which he brings up for the kids to touch in touch tanks.  All with some awesome video equipment and a 60″ LCD on the boat!  The kids loved it, and it was nice to take a ride out into Frenchman’s Bay.  We were lucky to have some pretty amazing weather.

Morning fog on Frenchman's Bay

Sea Star!

We only live two hours away, and can’t wait to go back for some bike riding for a day trip one day this fall.  If we can find time between K playing travel soccer and J doing the local rec soccer program.

Peg Leprechauns

Okay, this is my last post about peg people!  K came home last week saying that they had found leprechauns in the playground at school.  They had even caught one!  A few days later, K came home saying that he had talked to one of them and convinced them to come to our house!  So, on Thursday when they came home from school, they found these guys at our house!  K says that the one the he found looks slightly different.  He needs a black brim on his hat, a buckle on his hat, and a mustache instead of a beard.

Leprechauns are exploring the yard


Hmm...where should we build our cave-house?

You can make your own leprechauns using the pattern over at Wee Folk Art!

Peg person Thomas Jefferson

I am on a little painting peg people kick right now.  K had to do a President Project last month, and his president was Thomas Jefferson.  So, after being inspired by this post on the Etsy blog, I made him a Thomas Jefferson guy.

Thomas Jefferson

Ninja Guys

The boys started karate in January.  They are having an awesome time with it.  I made them these little ninja guys a few weeks ago.  They are just the 2-3/8″ people pegs from Casey’s Wood that I painted with acrylics and then sealed with some Mod Podge.  I made the mistake of making their eyes with a Sharpie, and the marker bled.  Wouldn’t recommend it.  I bought a paint pen for the next people that I made and it turned out much better.

Sunshine rainbow plushie

I was feeling very crafty this weekend, and after all the great energy of Saturday night’s craft project for Craft Hope, I spent Sunday morning crafting as well!  In addition to the owls that we made, I had an additional idea of making sunshine plushies based on this tutorial from Chez Beeper Bebe.  Well, we decided that it would be most efficient to only make one type of plushie, so the idea of the rainbow sunshine was put aside.  Well, it was so cute and I had already bought the supplies, so I made two on Sunday morning.

Oh my goodness.  Super-cuteness!!  I want to make more! Mine are a bit bigger than her template.  I just used my favorite Fiestaware serving bowl as my template.  The other change that I made (when crafting the second one) is that I embroidered the face prior to sewing anything together.  I found that much easier and quicker.  Easier to hide knots, etc.  Maybe part of that is that I used a back-stitch for my embroidery instead of the split stitch called for in the pattern.  The fabric is just regular cream colored fleece that I picked up at Joanns. And I made sure to go over each ribbon as I was sewing three times to try to make it super-sturdy.  So, sew over the ribbon, back-stitch over the ribbon, forward-stitch over the ribbon again and keep going until you get to the next ribbon!  I just placed the ribbons as I went and didn’t bother pinning them in first, since I’m not a “pinner.”

And I would like to comment on her story about how the “corporate toy-making man” patented this whole idea of folding ribbons into toys.  I think it’s insane personally, as the whole process is so basic, I don’t see how it can be unique enough to be patentable (but I’m not a lawyer, what do I know?).  And this is not the first story that I’ve heard where they have gone after small craftspeople who are making toys with ribbons.  Of course they can send mean letters to these people who they know can’t fight them, or won’t because the only person who wins in that fight are the lawyers who you are paying.  I can certainly tell you that I haven’t bought one of that company’s products in a VERY long time, and I have no intention of ever doing so.  I understand that they are protecting their patent but the way that they go about it just doesn’t feel right to me.  In any case, make one for yourself!  Because they are super-easy, absolutely adorable, and I can’t wait to give them to my baby friends.

Christmas Project Status and Open House over at Alewives

Okay, not a lot of posting going on because I’ve been busy getting ready of Christmas of course!  So, here’s what I’ve been up to, and some little information about a cool little Virtual Open House at my favorite fabric store.

Alewives Fabrics is located in Damariscotta Mills which is in mid-coast Maine.  If you are ever here in Maine (or you are you lucky enough to live here), then make the trip!  It is the best fabric store that I’ve ever visited.  Seriously.  My husband is lucky that it’s an hour away otherwise I’d have spent enough to send Rhea (@AlewivesGirl on Twitter, co-owner with her mom in the store) on a trip to Aruba.  Rhea is having a Virtual Open House today on her blog.  Just visit the blog, leave a comment, and she’s giving away some fab prizes.  And in the meantime, while you wait to see if you’ve won, check out her online store.

When I was there last time (at the Liesl Gibson sewing with knits class), I bought some awesome fat quarters of the new Anna Maria Horner Innocent Crush in velveteen.  Oooh!  It’s awesome.  I think I’m going to make some pillows from it.  And Rhea has a great eye for combining fabrics and her 20 fat quarter sets are fab.  I got a cotton set of Innocent Crush of that too.  Not sure what I’m going to do with that.  Hmm…I need to finish my Turning Twenty quilt with Amy Butler Daisy Chain, and then maybe I’ll make another one!

So in Christmas crafting news:

1) Still working on the Hood Tree Skirt.  I ran into a snag.  The front is 42″ round, so they say to use a 44″ square piece for the back.  Well, yes, you’d think that would be easy right?  Fabric is about 44-45″ wide.  Well, not when you’ve pre-washed it.  So, all my Christmas fabrics are only about 42″ wide and won’t work as the backing to compensate for any shifting that might occur as I quilt it.  And it needs to be big enough because the little houses applique go straight to the edge.  Can’t cut any of those off!  So, I need to piece the back.  Sigh.

2) I did succumb to a little “me” shopping at Sew Fresh Fabrics on Etsy.  They had some of comfortstitching’s new Sherbet Pips by Moda in stock! So, I got a charm pack!  So excited.  It’s not coming out until April otherwise. You can see the style in the Little Girl on  a Tree Swing mini quilt that I did a few months ago.  I can’t wait to make some stuff for the guest room with that fabric!  Sew Fresh Fabrics is great!  I also bought some Kona cottons and they mark all the pieces with little stickers with the color name.  So useful!

3) I am making some of these cute little owl ornaments.

4) And I have plans for these little house ornaments, a freebie project from the new book Scandinavian Stitches.

5) Hubby and I are going to use his woodworking skilz to make the boys Harry Potter-esque style magic wands!  We need to work on those.  Maybe tonight.

6) I’m making some more kid-drawing placemats for my mother in law.  Finally got the kids to sit down and make some special drawings, and I’m currently cleaning them up in Paint Shop. Then I will print on that inkjet fabric paper and make into placemats.  The problem is that last year’s placemats have not washed very well.  That inkjet printer fabric seems to hold onto stains.  I’m going to try to Scotchgard them this year and see how that works out. I don’t think I ever shared pictures last year??  I meant to do a tutorial for it but got side-tracked by the fact that they weren’t washing well and didn’t really want to recommend it until I figured out that problem.

7) Christmas Eve pajamas.  I make the boys pajamas every year that I give to them on Christmas Eve.  Haven’t started this year’s yet!  I’d better get cracking!  I have some quilt flannel with cartoon soccer players on it that I might use.  Or I have some baseball fleece.  Hmm…