Hands Around the World Wall Hanging

I just HAD to share my talented and awesome friend’s work.  She doesn’t have her own blog to share it all with you, and I couldn’t let this go without sharing with the world.  It is gorgeous!  And I’m not sure if the photos do it justice.  She created this for our Montessori school’s annual auction fundraiser.  I helped her brainstorm the design (and I cut out a lot of those hands), but it turned out so much *more* than I was envisioning.  She traced each child’s hand in the daycare room at school.  So the hands are from ages 3-9.  Then we traced these onto various shades of wool-blend felt in skin tones and cut out the hands.  She free-hand drew the earth’s continents and cut those out.  And then she hand sewed the entire thing together.  I absolutely love the stitching detail that she did on the background.  She said that it was being shifty so she needed to do something to keep it together, but practicality aside, I just love the concentric curves going up and down on the piece.  We cut out the letters using the wool-blend felt and my Sizzix.  Worked like a charm!  They are attached with a simple running stitch.

She got all the felt from Wool Felt Central.  I have the “Wool Sampler” box set which comes with all the colors that they sell and we were able to pick out the various colors that she wanted to use for the skin tones, and the right color blue and green for the earth.  I think she chose a great color for the background.  I think it’s the pistachio.  The order came really super-quick, which I was surprised by since they are located in Nebraska, and we are as far away on the East coast as you can get.  She also used the 20% off coupon on Wee Folk Art, so saved some money there (it’s a fundraiser after all!).  Wool Felt Central has a cheat sheet for matching their felt colors to DMC floss, so she was able to order floss that matched all the colors of the hands, background, earth, etc.

See?  Isn’t even the back gorgeous?!  I absolutely love how it turned out and thank you for letting me share it with you!

She also made a special piece with the older children in the daycare program (ages 6-9).  It was one of the murals on Art Projects for Kids (see here).  She used the tutorial provided on the blog to mount the drawings to a canvas using the dry wax paper and sharpies.  I think the kids did an amazing job.  The total canvas size is about 20.5″ x 20.5″ if I remember correctly.  She did touch it up very slightly in a few areas, but the kids all did an amazing job with the detail work.  I was really impressed.  My favorite is the tiger!

I can’t wait to see how much they go for at the auction!

Sewing Knits with Liesl Gibson of Oliver+S

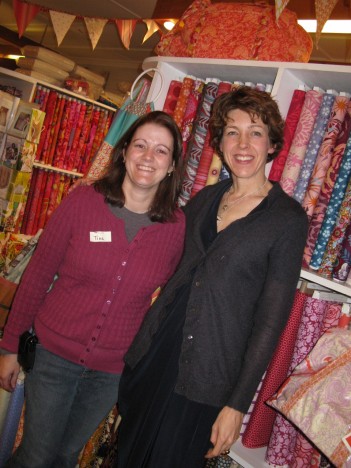
Me and Liesl!

I had the most amazing time on Saturday taking a sewing knits class at Alewives Fabrics with Liesl Gibson of Oliver+S.  It was awesome!!  Liesl is sweet and amazing and fun.  There were only 12 students in the class, and we all got a lot of hands-on instruction on the best ways to sew knits with our particular sewing machines (no sergers here!).  I ended up using a stitch that I never would have thought of using on my own.  I made the Oliver+S nature walk pants.  Most of the students in the class were making the hopscotch shirt/dress.  They all turned out great, and the City Weekend knits are absolutely gorgeous.

My friend's hopscotch dress made with some Patty Young knits

It was a long day, but I decided to stay for the Q&A with Liesl that was going on that evening.  Fun!  She showed us the proofs for her new book, “Little Things to Sew” coming out in February (I’m reserving a signed copy from Alewives), as well as the new fabric collection coming out this spring.  The book is darling!  I can’t wait to make the little felt mittens as a gift for some lucky baby/toddler, and I have a feeling that J is going to *need* the penguin backpack.  The Little Red Riding Hood cape pattern looks adorable.

You can check out more pictures from the day on Rhea’s Alewives Girl blog.

Here are the knit pants that I made.  I made a size 10 (pattern goes to 12), and since I didn’t have K there to try them on, they ended up a bit big in the waist.  Even though I measured his waist twice before I left!  No worries though because Liesl showed me how to open up the seam and adjust the elastic if I needed to.  The fabric is just some interlock that I picked up for cheap at Mardens.  They are just going to be “around the house” pants, but they would be super-cute as pajama pants with the lettuce hem that Liesl describes on her blog.  Or very cute underneath a dress/tunic.

Nature Walk Pants

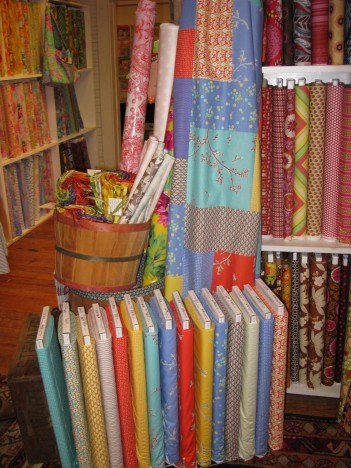
And if you are ever anywhere near midcoast Maine, you must take a road trip to visit Alewives.  It is the best shop!  I only wish it were closer to my house.  (Maybe it’s good that it’s not.)  Of course, I couldn’t leave without a little shopping.  I picked up a 20 fat quarter set of the new Anna Maria Horner Innocent Crush collection and some of the new Innocent Crush velveteen which is absolutely gorgeous (just some fat quarters, I think I am going to make a pillow).  I also got some Christmas fabrics that I’m going to use to make some of the placemats in the Quilting Arts Holiday book designed by Alissa Carlton of Handmade by Alissa.

It was an excellent day!  Here, check out the shop.  Don’t you just want to browse in there forever???

Alewives Fabrics

Alewives Fabrics

Alewives Fabrics - Turning Twenty Quilt in City Weekend on display

Homemade soup mix gifts for the holidays

What is better than a gift of a homemade soup mix at the beginning of winter??  A homemade soup mix that is designed for the crock pot!

I’ll be sharing the how-to and recipe in the next few days.  I need to make up a batch and make sure that none of the seasonings need to be tweaked.

Making Cider

Hubby brews beer. Quite excellent beer, if I’m allowed to brag.  Last year, he ventured into new terrain and made hard cider. Mmmm…it’s so good. So, since it’s that time of year again, we set about grinding and pressing apples a few weeks ago.

First step….buy apples from the local apple farm….or a few local apple farms as it may be so you can get lots of different varieties. He has particular favorites that he is always on the hunt for.  The apples you like to eat, or the apples you like to use to make pie, are not the same apples that you want to use to make cider. Also, we have friends with old apple trees and we have no idea what kind of apples they are.  We harvested them last year, and the result was quite tasty.

Stopping to check out the antique tractor at the apple farm

Step two: Grind lots of apples using homemade grinder made with heavy-duty kitchen garbage disposal.

Step three: Press apples in homemade press using muslin cloth squares which I sewed last year.  And put juice into carboy to sit around for awhile.  Hubby uses commercial yeast as opposed to relying on the wild yeast, so he has to add something (blanking on what exactly) to stop the wild yeast fermentation, and then he adds his commercial yeast a day or two later.  Last year, he used champagne yeast, but this year he went with some beer yeast.

He probably won’t bottle it until the Spring.  Last year, he fermented each varietal separately, and then blended them when they were bottled.  Not sure what his plans are for this year.  Definitely good stuff though!

Edited to add: He also added that he will rack it a few times before he bottles it.  His experience last year was that it gets better the longer that you let it age.  And the stuff that he adds to stop the wild yeast fermentation is some sort of sulfite additive.

Making Leaf Spirits

Inspired by the post on Twig and Toadstool, I visited my son’s third grade class for their “Halloween” party last week (not technically a Halloween party, but more of a fall-inspired party with healthy snacks based on their nutrition unit that they have been doing), and helped the children make leaf spirits!  They had a great time.  I pre-cut some leaf templates out of cereal boxes, and brought along felt squares (the eco-felt stuff) cut into squares of approximate size.

Prior to starting the craft, his teacher read this story called “The Life of a Leaf.”  Such a wonderful story!  I brought felt in the three colors of the leaf’s coats – yellow, orange and red.  My son’s school colors are orange and black, and the class was having a wear-orange-and-black day.  So, orange ended up being an extremely popular color and I ran out of squares!  Eek!  That’s okay, some kids stepped up to the plate and were willing to take yellow.  I also brought roving in the three colors to match.  We used Aleene’s tacky glue in the gold bottle since that stuff dries faster than most glue.

I had pre-sorted the heads and acorn caps, so that I would make sure that I had enough that matched.  I collected the acorn caps this summer (in August), and prepped them for storage by baking them at 200 degrees for 20 minutes.  You want to make sure you get any miniature creepie-crawlies before storing them!  For some reason, we had an amazing acorn harvest this year.  Must have been the heat.  Some of them were huge!

The kids had a great time, and I enjoyed coming into the classroom and sharing a craft.  Even though it was a bit frazzling with 19 third graders and a fire drill in the middle, to boot!

November

It was a frosty morning today.  Low of 25 degrees last night, and I had to bundle up in my winter coat, hat, scarf and gloves when I walked the dogs this morning.  Time to put away the Halloween decorations and start thinking about Thanksgiving and Christmas!  I’ve actually been thinking about Christmas for quite awhile, but I’ve mostly been doing thinking and not a lot of doing.  Time to put things into gear!  In the meantime, I need to put the garden and yard to bed, and plant some bulbs before the ground gets too hard.

I dug up my carrot crop the other day.  I planted my seeds about 3-4 weeks too late, so they are all very tiny.  But, they are so sweet and yummy.  I roasted a bunch for dinner the other night, and will probably do it again tomorrow.  I’m definitely making sure that I plant them on time next year.  Hubby built a special deep square foot box for them (4′ x 4′) which is what put us behind this year.  No excuses next year!

And before I start talking about Christmas….if you missed it last year, this Montessori practical life buttoning felt turkey was a huge hit with all the kids in my son’s Montessori school (age 3-6 classes) last year.  Think about making one for your own little one!  It was really quite easy.

When I made the second and third ones, I switched to a zig zag stitch as I went around the outside of the turkey body and the feathers, and it looked a lot better.  The face is hand-embroidered.

Also, if you are really thinking ahead, I thought I would share my wool felt advent calendar that I made two years ago.  I just *love* it!  It was so worth all the time that it took to make each individual pocket.  If you start now, you can still be done by December 1st!

The chickadee pocket is one of my favorites.

My Plants vs. Zombies Guys

It was a cold Halloween night!  Good thing the Pea-shooter guy had that fleece poncho / flower pot.

With Halloween and my big “sure I’ll chair the steering committee of that big fund raising concert” over, I can now concentrate on important things like crafting and a handmade Christmas!

All sorts of ideas are swimming around my head!