Small Embroidery Hoops

I made these little embroidery hoops for my swap partner.  I just love them, so cute.

They are pretty simple to make.  The background is a cream colored linen that I had in my stash, and the wooden embroidery hoops were purchased at Michael’s.  They are about 4″ in diameter.  I cut pieces big enough for the hoops, and used a pencil to lightly draw where the circle of the inside of the hoop would be on the fabric.  Then, I cut a bunch of tiny triangles from scrap fabric, and used my free motion quilting foot on my machine (it’s called a darning foot) to sew the little bunting flags onto the linen.  I used a chocolate brown thread which I think looks nicer than using black thread.

Then I put the linen into the hoop, and wrote a little phrase in cursive with a disappearing ink pen.  The embroidery is just a simple back-stitch.  I think the darker magenta embroidery floss turned out nicer than the lighter green color.  I’ll use darker colors in the future.  “Bailar mas” mean “Dance More” in Spanish.  The dot on the “i” is a french knot.

The Back


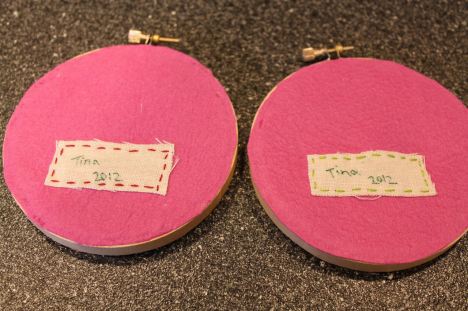
For the back, I first made the little labels to sign the piece.  It’s a scrap piece of linen, and I used a fabric pen to write my name and the date.  Then, I used a running stitch to attach the name tag to a piece of felt for the backing that I had trimmed to fit the back of the hoop.  Trim the linen from the back of the hoop so there’s about 3/4″ of linen going all the way around.  Put a bead of glue (I use Aleene’s Tacky Glue in the gold bottle) around the lip of the hoop and press the linen down to the hoop.  Then, run another bead of glue around the lip of the hoop (this time on top of the folded over linen), and place the felt circle down on top.  Press it down, straighten it up, etc., and let dry for an hour or so.

Simple, and super sweet!

Doodle Stitch-Along, Week 2

Here is my completed block for Week 2 of the Doodle Stitch-Along (yes, I know that we are already into Week 4, but I’m happy to be as far along as Week 2!).  I really love how this one turned out.

The pattern was for the boy and girl.  I added the butterflies from the Week 3 motif, and then I just freehanded the grass and brown toadstool, as I thought they looked better standing on something instead of floating in the air.

I used a long-and-short stitch for the red hood and the boy’s shorts, the hair is a stem stitch on the inside, and just two rows of back stitch on the outline, and the rest is pretty much just back stitch with some french knots here and there.  The leaf and mushroom stem were satin stitch.

You can download the Week 3 motifs (mushrooms and a tree trunk house) and the Week 4 motif (mushroom house) on the Lark blog.  I made up my quilt blocks for Block 3 and 4 this morning so I’m ready to get started on the tree trunk house tonight!

Doodle Stitch-Along, Week 2, In Progress

Week 2 is still in progress, but what great progress it is!  I love it!  (That hood took me quite awhile.)

Doodle Stitch-Along, Week 1

Helloooo!  Happy New Year!  Yes, I realize that it’s January 19th.  Sorry for the long hiatus.  I got a new camera for Christmas and I haven’t had time to figure out how to download the pictures.  So, finally took the time to figure it out and here I am!  Lots of stuff to share from Christmas, but in the meantime, I joined along in the Lark Books Doodle Stitch-Along with Aimee Ray.  She is putting out one free design from her Motifs book each week and you can stitch it up.  There is a Flickr group to play along.

I decided to make mine into a mini-quilt, so before starting my stitching, I created my quilt block with some rainbow blocks and white Kona (in Snow) in the middle.  The rainbow blocks are made from sewing some 2.5″ strips from the Kona brights jelly roll together.

Here is my first week’s design of the gnome and mushroom!  (You can download it here.)  Isn’t he a cutie?

Gnome and mushroom embroidery

Close-up of embroidery

I used the following stitches and colors:

* Mushroom  – Red 666 in a modified long-and-short stitch
* Mushroom stem – Taupe 3782
* Mushroom spots – Ecru in a satin stitch
* Little Swirls and dots – Aqua 3846 in a split stitch and french knots
* Hat – Green 906
* Belt – Orange 722
* Pants – Electric blue 995 (LOVE this color!) in that modified long-and-short stitch again
* Beard – Gray 415

I love the rainbow block outline.  I can’t wait to see how it will look with all four blocks completed!  Next up: Woodland Children!

November

It was a frosty morning today.  Low of 25 degrees last night, and I had to bundle up in my winter coat, hat, scarf and gloves when I walked the dogs this morning.  Time to put away the Halloween decorations and start thinking about Thanksgiving and Christmas!  I’ve actually been thinking about Christmas for quite awhile, but I’ve mostly been doing thinking and not a lot of doing.  Time to put things into gear!  In the meantime, I need to put the garden and yard to bed, and plant some bulbs before the ground gets too hard.

I dug up my carrot crop the other day.  I planted my seeds about 3-4 weeks too late, so they are all very tiny.  But, they are so sweet and yummy.  I roasted a bunch for dinner the other night, and will probably do it again tomorrow.  I’m definitely making sure that I plant them on time next year.  Hubby built a special deep square foot box for them (4′ x 4′) which is what put us behind this year.  No excuses next year!

And before I start talking about Christmas….if you missed it last year, this Montessori practical life buttoning felt turkey was a huge hit with all the kids in my son’s Montessori school (age 3-6 classes) last year.  Think about making one for your own little one!  It was really quite easy.

When I made the second and third ones, I switched to a zig zag stitch as I went around the outside of the turkey body and the feathers, and it looked a lot better.  The face is hand-embroidered.

Also, if you are really thinking ahead, I thought I would share my wool felt advent calendar that I made two years ago.  I just *love* it!  It was so worth all the time that it took to make each individual pocket.  If you start now, you can still be done by December 1st!

The chickadee pocket is one of my favorites.

Embroidered Mini-Quilt

Girl on a Tree Swing Mini-Quilt

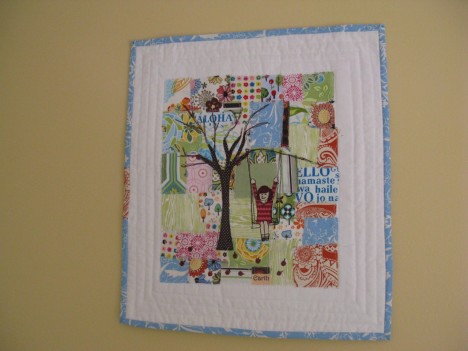
I have several tutorials that I want to try linked over in my right sidebar.  One that has been on there for quite awhile, I can finally check off! Comfort Stitching’s Girl on  a Tree Swing mini-quilt tutorial!  I wouldn’t necessarily say that it was quick and easy, but it was relatively, especially considering the huge cuteness-payoff!  The tutorial is very well-written and I had no questions as I moved through the various steps.  The hardest part was deciding what fabrics to use on the patchwork background!

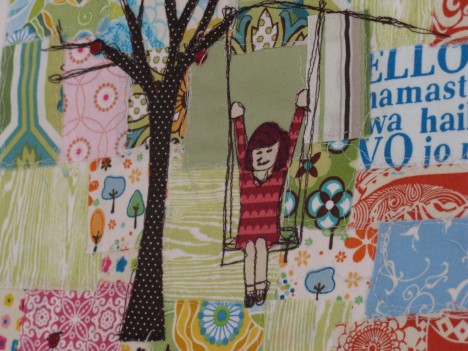
Up-close of the appliqued girl

I have been practicing my freehand machine quilting, so I feel like I did a pretty good job on that.  And by the time I finished outlining all the little patchwork squares, I was getting into a good groove for doing the sketchy stitching applique part of the tree/girl/swing.  I just did some straight line quilting around the white border area for the “quilting” aspect of it.  And I really like the binding that I chose.  (It has orange!)

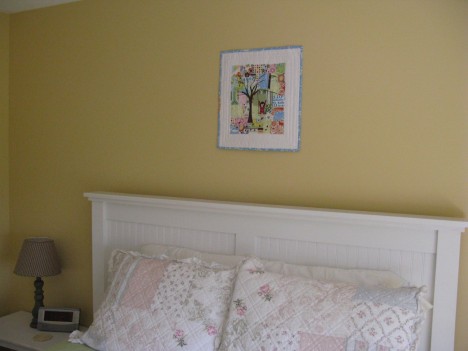
I just love how it turned out!  It’s hanging over the bed in our guest room.  It’s actually too small for that space, so I’ll probably move it to one of the side walls, but I’ll leave it there for now.

Hubby made the bed

Felt Flower Garden House Embroidery Project

I used Checkout Girl’s awesome Little Pink House tutorial that was posted on Sew Mama Sew awhile back to make this!  I didn’t break out much from the pattern, but it was my first project like this and I wanted to get my hands around it first.  Now I need to sketch something up to make something new!

My "Little Pink House"

Close-up of the flowers

The background is linen, and the felt is all wool.  I just love the spring green color of the leaves.  I can’t remember where I bought that color but I’ll have to figure it out because I love it.  The orange and aqua colors are some hand-dyed felt that I got from Felt-o-Rama.  Gorgeous colors, but the felt is a bit thin (1mm according to the website, as compared to the wool blend which is 1.2mm).  Fine for this sort of project though.  They sell hand-dyed embroidery floss to match.

Montessori Word Family House

J’s teacher showed me an idea that she got from a blog and asked if I could come up with something similar for their classroom.  Well, how can I say no to such a challenge?  **Update** I finally found the link for the original inspiration for this project at itty bitty love.  She has some examples of word family cards that the children can choose from.  Check out her blog.  Great Montessori ideas!

Word Family House

The purpose of this work is to put a word ending in the top attic window.  So there will be a card with “AT” on it for example.  Then, the child will have more cards with the “AT” ending which the child places down the right-side column of windows, cards with beginning sounds, and then objects that match the words that can be created…”CAT” or “BAT” for instance.  I’ll try to get some pictures of the work in progress once J’s teacher puts it out.

The size of the red house is about 12×12 inches, which was just the size of the pieces of wool-blend red felt that I had (purchased from Felt-o-Rama).  The white windows on the red part of the house are 2×3 inches.  I sewed those on with my machine and a straight-stitch.  So here was my process:

1) Cut out two pieces of tan for the roof.  Attached the window in the center of one piece using white embroidery floss and a whip stitch.  Then, I used a back-stitch and dark gray floss to make the window panes, and to outline the window.  I then put the two tan pieces together, sandwiched in a piece of dark charcoal (a felted sweater scrap) and used a decorative stitch to sew the roof together.

2) Cut out the main house window pieces.  I attached these to the front house piece with Heat-n-Bond Lite in order to get them to stay on securely when I was sewing them on.  I find this works better than just pinning which can cause the pieces to turn out a bit wonky by the time you are done if you aren’t careful.  Then I sewed them in place with my machine, matching thread, and a standard straight stitch.  I hand-stitched the window panes with a back stitch and dark charcoal embroidery floss.  You could put the windows on by hand with a whip-stitch but I was trying to save a bit of time with eight windows!

3) I then embellished the house a bit with the purple coneflower, grass and butterfly.

4) While watching the awesome skating on the Olympics last night, I put together the two red pieces by hand with a blanket stitch.  Stitched all the way around all sides.  I then attached the roof using a whipstitch along the bottom edge of the roof where it meets the front piece of the house.  I didn’t tack it down in the back at all.  I didn’t really feel like it needed it, but I can do that later if it turns out to need some additional support after it’s been used awhile by the children.

Purple coneflower embellishment on the house

Butterfly embellishment

This was a fun project!  I can’t wait to see it in action in the classroom.

Bendy dolls

My doll -- front -- she is 2.5" tall

I bought some dolls from Princess Nimble Thimble’s fabulous shop as Christmas gifts for the nieces/nephew (and one for me! how can you resist?).  I shared them with one of my crafty friends who attends the monthly crafting night that I host, and she was enamored!  I actually had a few bendy dolls in progress from months and months ago that I had created soon after purchasing the book, Felt Wee Folk.  So, using the instructions and base patterns in that book, and gazing in adoration at Princess Nimble-Thimble’s creations on Flickr, we made some dolls at our Saturday crafty night last weekend!  I absolutely love them.  I did not expect them to turn out so wonderfully as a first attempt.  Now I need to make more!

My doll -- back

My Star Wars-obsessed 7yo thinks I should make one like Ventress.  Hmm….and my 5yo thinks a “soldier who guards the gates of the castle” would be cool.  Then the 5yo was looking through my Felt Wee Folk book tonight, and started flagging pages he liked with Post-It notes.  I see more bendy dolls in my future!

My friend's doll -- who is a bit bigger -- maybe 3.5"

Thanks to Dannielle at Princess Nimble-Thimble for the wonderful inspiration (oooh…she has ballerinas in stock!).  Her creations are amazing.  Seeing how long it took me to make just one, and how imperfect it is, I’m in awe of her talent!  She also has a photo tutorial for the dolls on Flickr.

“Not my gumdrop buttons….”

Gingerbread boy ornament

Gingerbread boy ornament

I recently ran across this pattern/tutorial on Elsie Marley’s site for a half-eaten gingerbread boy ornament, and I had to make it!  He’s so adorable!  It’s an interesting technique to sew the front cut piece onto a rectangular back piece, and then cut the back piece into the correct shape after sewing.  Worked very well.  My only hint on making this would be to stuff it a little bit when you are halfway around instead of waiting until the end.  I had a hard time getting stuffing into the far arm and leg, and it would have been easier if I had stuffed as I went along.  I also used a backstitch to embroider the year on the back of the piece.  I can’t wait to hang him on my tree when we put it up in a few weeks!

Gingerbread boy has already been a hit with J

Already being played with by J